Customize your Windows 11 experience, learn about the best new features, and make sure you’re getting the most out of your desktop OS.
If you take the leap and upgrade to Windows 11, you’ll notice a slick redesign with a Chrome OS-like centered taskbar and rounded corners on apps. Under the hood, it’s largely the same OS, but there are some new features you should know how to use. These tips will ease the transition from Windows 10.
Realign the Start Button
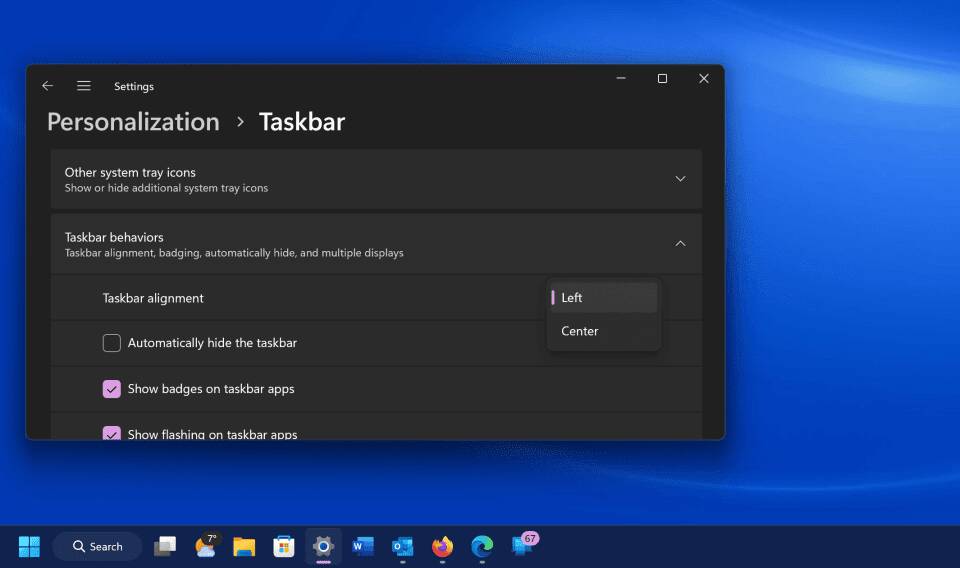
The first thing that will jump out at you is the placement of the Start button. Long located in the lower-left corner of the screen, it’s now centered with the rest of the icons on the taskbar. But don’t worry, you can change it back.
Right-click the taskbar and open Taskbar Settings. Select the Taskbar Behaviors drop-down and change Taskbar Alignment to Left.
Your taskbar icons move to the left and the Start button goes back where it belongs. For more on personalizing the Windows 11 taskbar.
Add More Options to Your Right-Click Menu
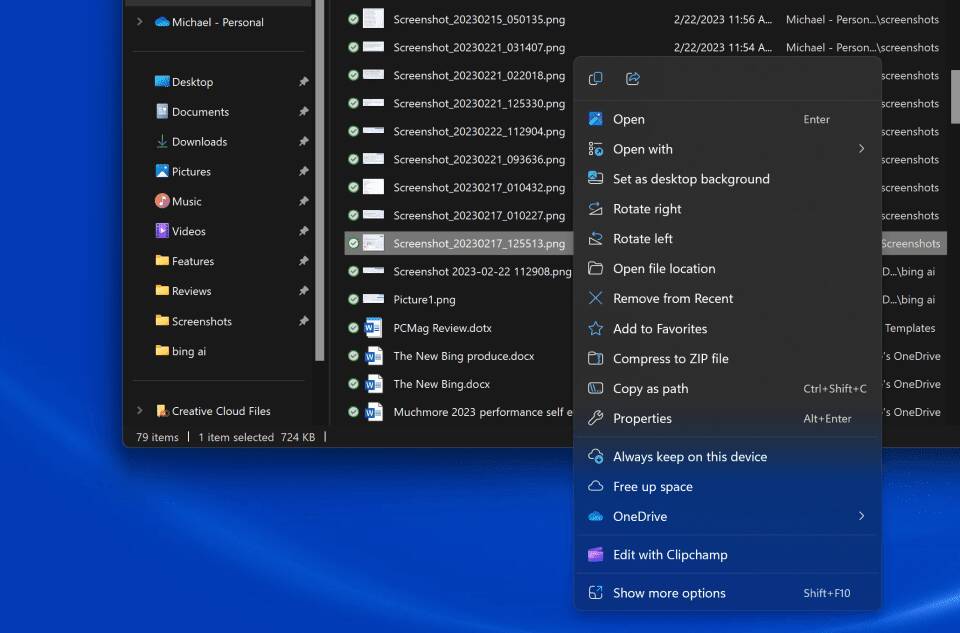
The right-click menu now focuses only on the most important settings. Should you need more settings—print, set a new background, or view the full file location, for instance—select Show more options to open a spill-over menu.
Customize the Quick Settings Panel
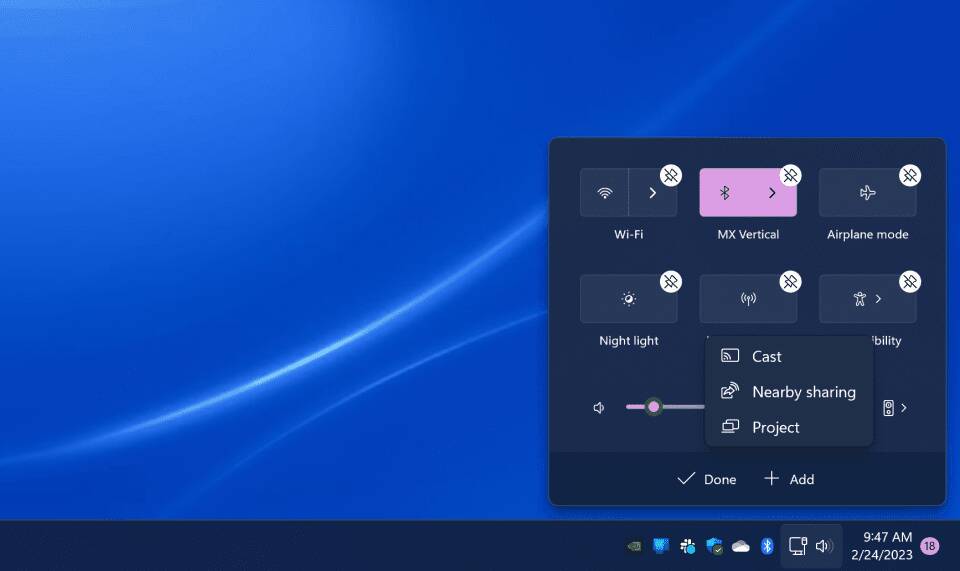
Windows 11 separates the Quick Settings that appear in the Action Center in Windows 10 from that panel’s notifications. Click the area of the taskbar that has Wi-Fi, speaker, and, battery icons to open a settings menu that lets you control Wi-Fi, Bluetooth, airplane mode, battery-saver mode, and more. To add or remove settings buttons, click the pencil-shaped Edit quick settings button. Unpin what you don’t want or click Add to make new features accessible from the Quick Settings menu.
Create and Manage Multiple Desktops With Greater Ease
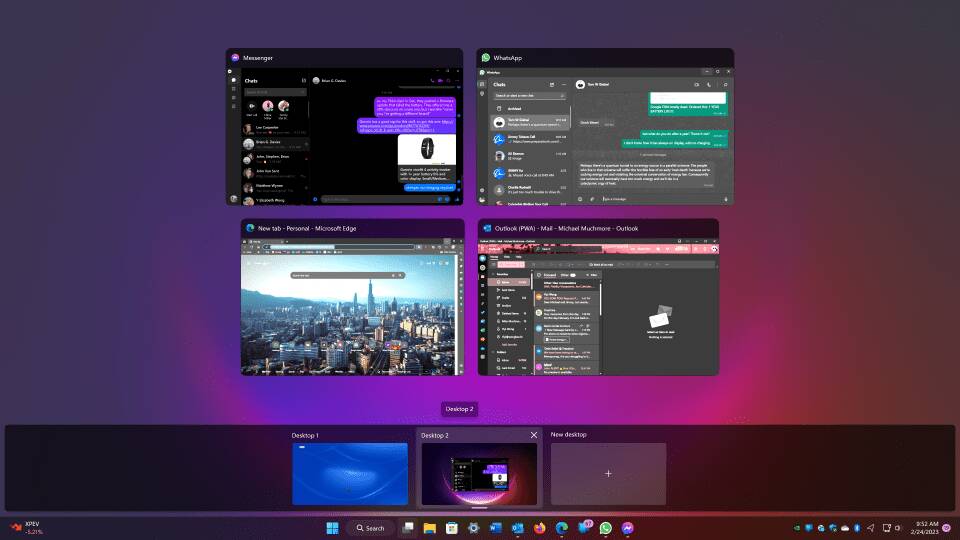
Microsoft replaces the old Task View button with a redesigned icon on the taskbar, which makes it easier to create and manage multiple desktops. Just hover over the icon to see any open virtual desktops or create a new desktop. These desktops can then be rearranged as needed, and apps that are in one desktop can be dragged into another.
Pro tip: You can use different wallpapers for each virtual desktop. Right-click on the desktop, choose Personalize, then Background, and choose a different image on each desktop. Not that this only works for the Background choice, not for Themes. If you choose a Theme, it applies to all virtual desktops; however, after applying a theme, you can change the background per desktop. When you do this, you see a cool cross-fade between the two backgrounds when switching.
Gather Your Widgets
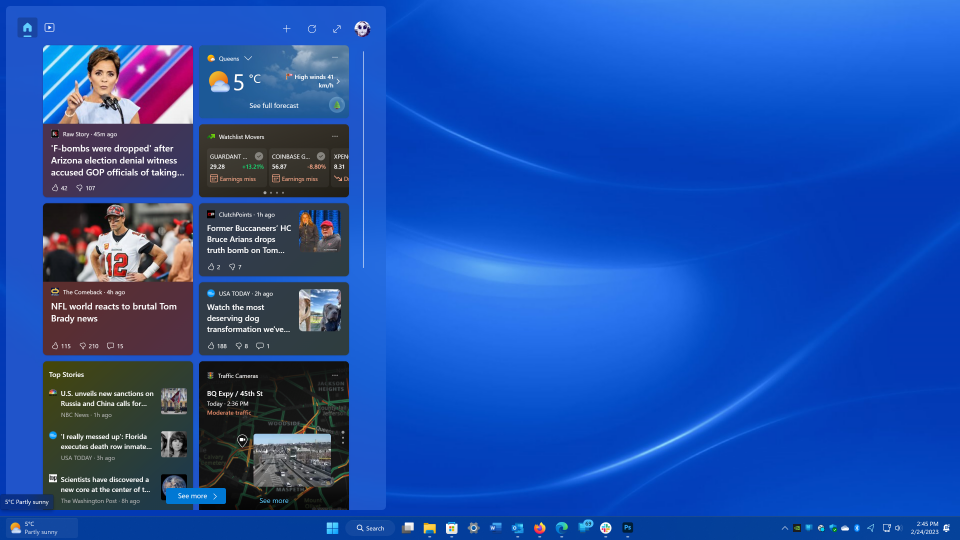
While Windows 10 dabbled in widgets, Windows 11 goes all in. If you want to check the weather, look up sports scores, track stock prices, watch nearby traffic, manage your Outlook calendar, cross tasks off your to-do list, or read the latest news, a new Widgets icon on the taskbar has you covered. You can customize the widgets to suit your needs, rearrange them on the page, and manage your newsfeed preferences through Microsoft News. In recent Windows 11 preview builds, third-party widgets make an appearance in the panel, including entries from Spotify and Facebook Messenger—they should be available in an update arriving soon.
Learn New Ways to Snap Your Window Layouts
Microsoft has supported the snap and resize feature since Windows 7, but it gets a boost in Windows 11 with Snap Layouts. You can still drag windows to the sides and corners for half- and quarter-screen layouts. Windows 11 adds a hover menu over the Maximize button that offers layout options—one large window on the left and two on top of each other on the right, or three in a row, for example. Your choices depend on the size of your display.
Click to select your preferred formation and then move your apps into place. You can turn this behavior off in Settings if you prefer, and some keyboard shortcuts let you quickly snap windows. For example, Windows Key-Left Arrow snaps a window to the left half of the screen.
Chat With Teams
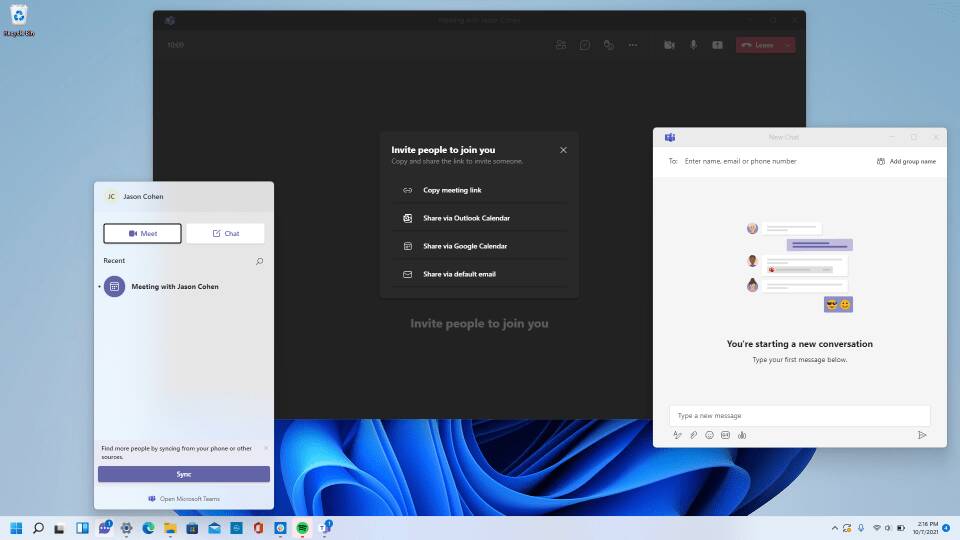
Microsoft Teams, the company’s free messaging, calling, and videoconferencing app, is built into Windows 11. Launch video calls and start chats from a new Chat icon on the taskbar with no need to open the Microsoft Teams app. You can sync your contacts through the Teams mobile app, but if your contacts don’t use Teams, you can send them invitations via email or text. You can also have SMS conversations with contacts even if they don’t sign up for Teams, and they can join a video chat from a web link.
Get Things Done With Focus Sessions
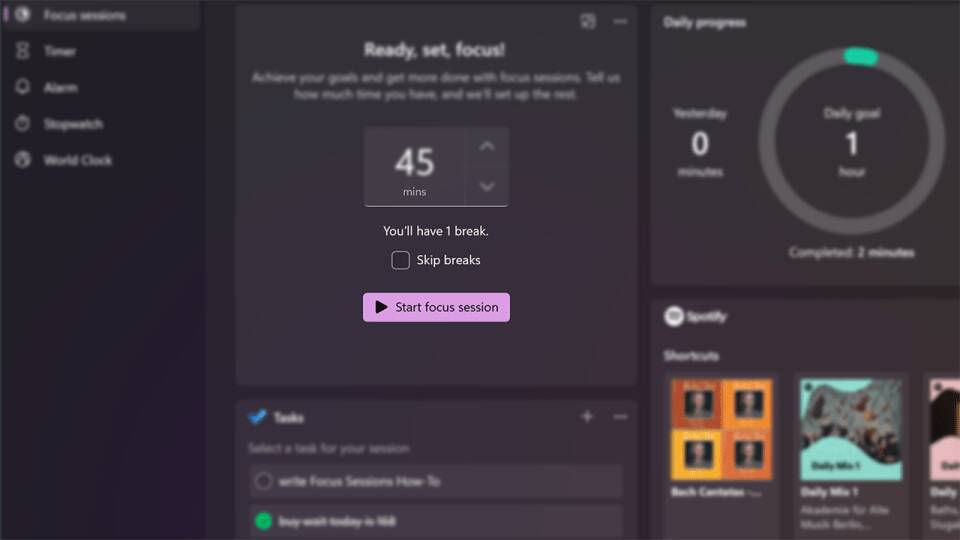
With messages and video chats popping up throughout the workday, it’s easy to get distracted. Focus Sessions in Windows 11 encourages you to set aside time for work that requires uninterrupted deep focus. It’s currently available in the new Alarms & Clock app, and offers a quick way to get at least 30 minutes of distraction-free work time. If you go beyond 45 minutes, the app automatically schedules a five-minute break about midway through your session. Here’s a step-by-step guide on setting it up for your PC.
Add Tabs to File Explorer
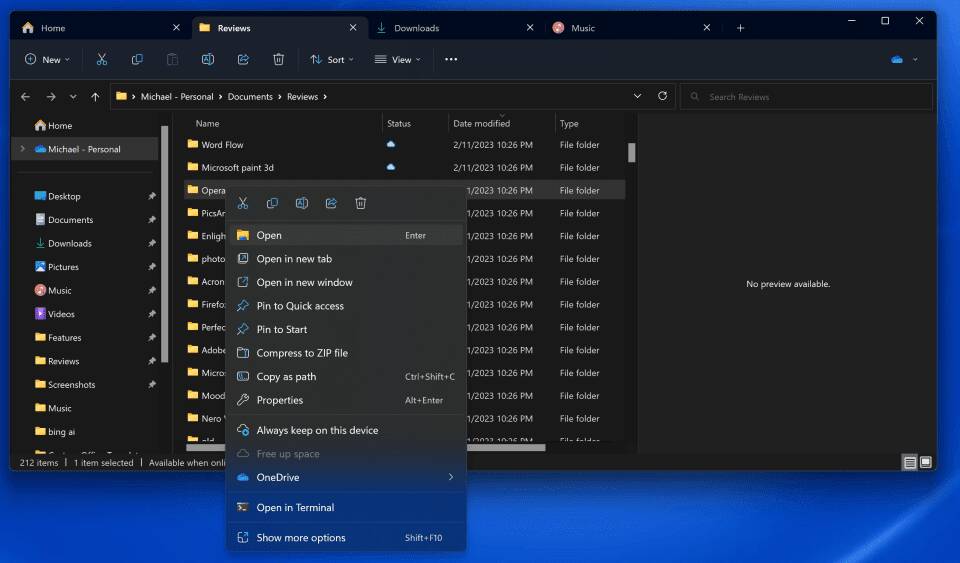
A top feature added in the Windows 11 22H2 update is that File Explorer finally gets tabs like its macOS counterpart Finder has had for years. Having tabs saves you from littering your desktop with multiple File Explorer windows when you need to view more than one at a time. Just right-click on a folder and choose Open in New Tab, like you would in a web browser.
Pro tip: You can drag a file between tabs. Just drag it to the desired tab and then down into the file list for that tab. Also as with a web browser, you can drag tabs sideways to rearrange them and hit Alt-Left Arrow to navigate back in a tab.
With the initial Windows 11 release, Microsoft streamlined the ribbon at the top of the File Explorer menu. Cut, Copy, Paste, Rename, Share, Delete, Sort, and View choices get prominent buttons at the top, saving you from having to wade through multiple menus you seldom use. Windows 11 also adds a New button for creating new folders and shortcuts, as well as documents based on the programs you have installed. The buttons displayed change based on context, too, so, for example, when you’re searching in the right-hand search box, you get a Search Options button.
Pair Input/Output Devices
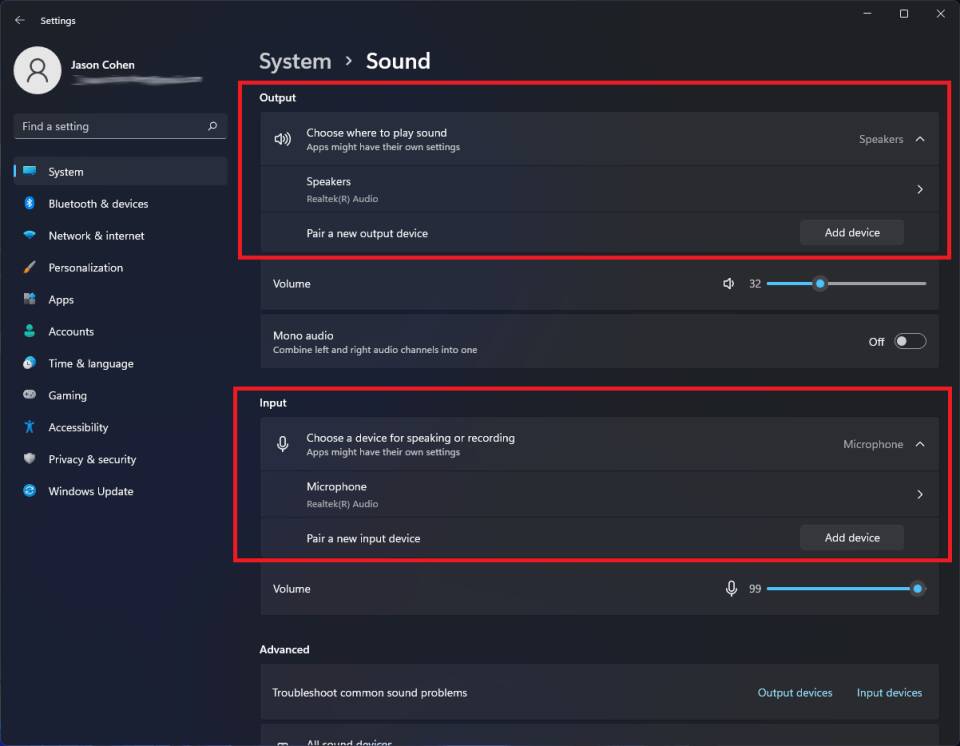
Windows 11 gets a full-featured Sound menu with the ability to pair new input and output devices.
Open Settings > System > Sound and click Add device under the Output section to link external speakers or other devices. Or click Add device under Input to connect an external microphone.
You then have a choice to connect via Bluetooth, wireless docks, and more. Scroll down to the Advanced section and click All sound devices to view a full list of all input and output devices that have been connected to your PC.
Listen With New Sound Modes
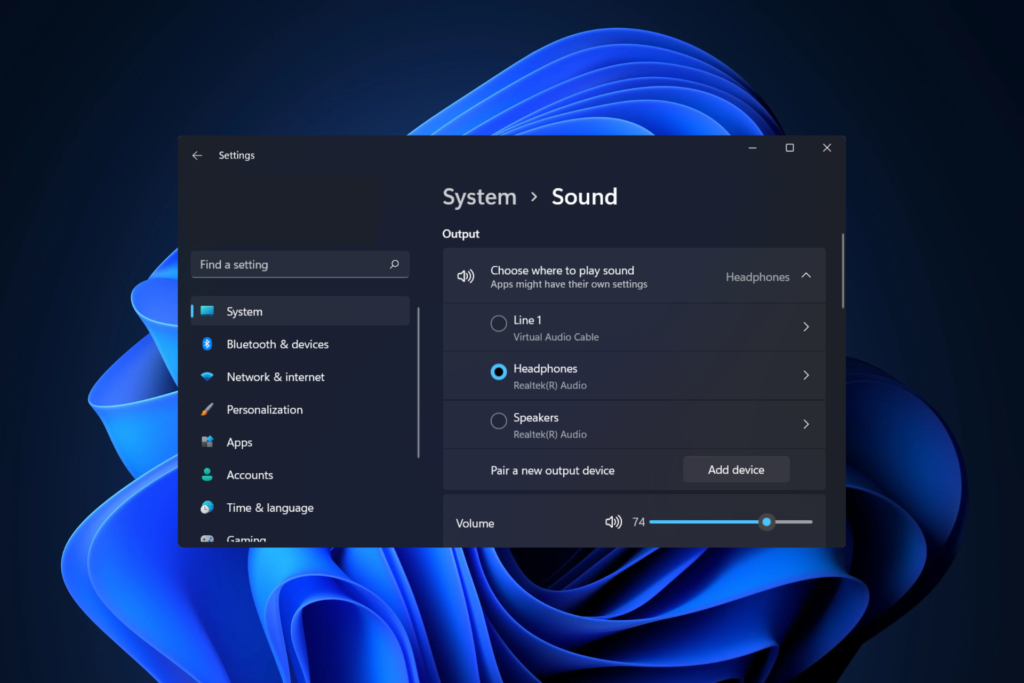
You get extra control over your audio output in Windows 11, including mono audio and enhanced audio modes. To go mono, open Settings > System > Sound, then enable Mono audio to combine the left and right audio channels.
For enhanced audio—which includes bass boost, virtual surround, room correction, and loudness equalization—click All sound devices under the Advanced section of the Sound menu, choose a device to access the Properties menu, and enable Enhance audio.
View the App List
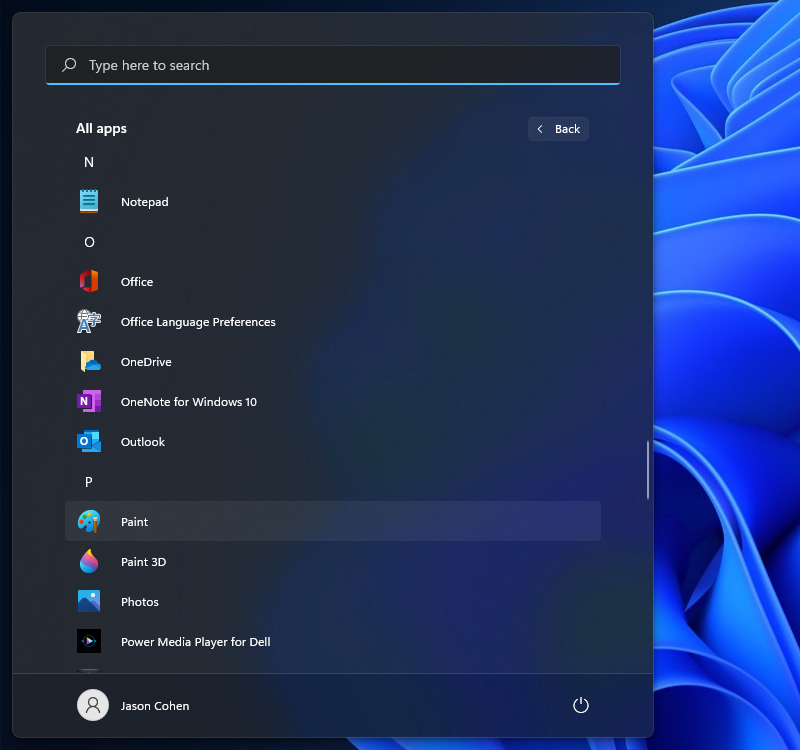
Windows 11 adds an extra step to view your full list of installed apps. Instead of opening the Start menu and immediately seeing the App List next to your live tiles, you have to click the All Apps button in the Pinned section of the Start menu. You will then be able to browse the list or search for a specific app.
Pin Apps to the Start Menu
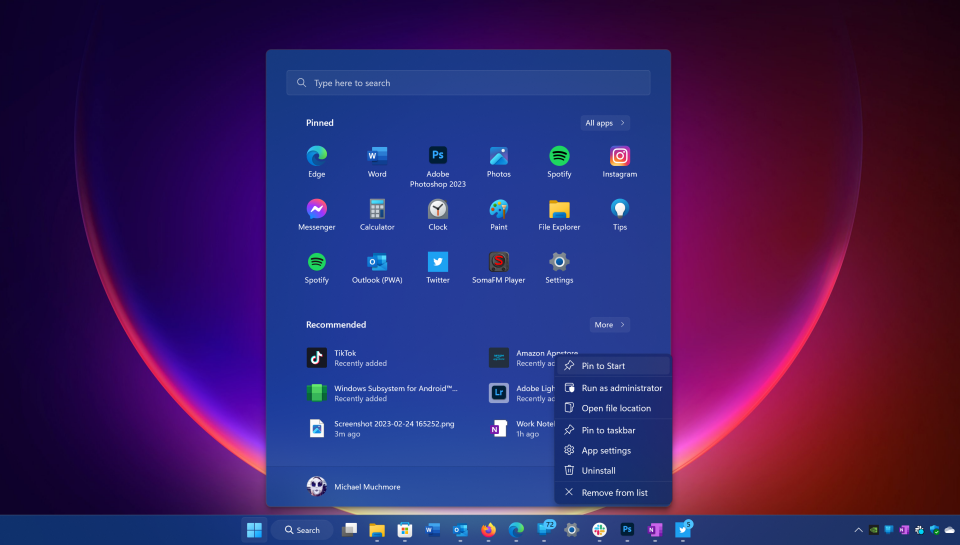
Live Tiles are gone in Windows 11. In their place is a more simplistic Start menu where you can pin apps for easy access. Open the App List, right-click on an app, and select Pin to Start to move it to the Pinned section. Then drag the app into your preferred position. To remove apps, right-click and choose Unpin from Start.
A newer option that arrived in a Windows 11 update is the ability to drag icons on top of each other to create folders, as you would on a mobile operating system. You can also adjust the relative sizes of Pinned and Recommended icons.
Customize the Start Menu
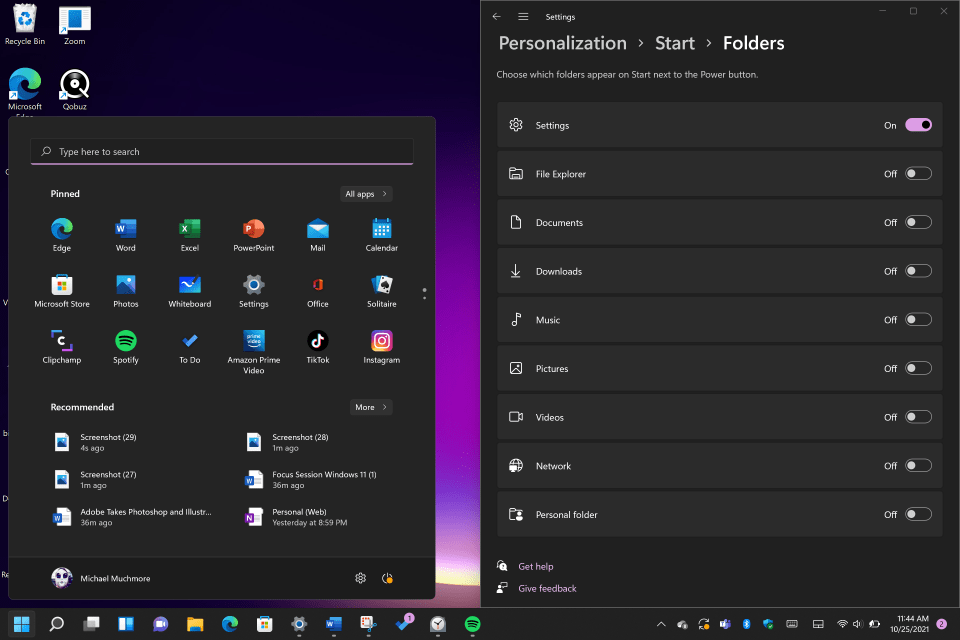
In Windows 10, the Settings button appears above the Start button when you tap it. Not so in Windows 11, but you can add it back (Opens in a new window) via Settings > Personalization > Start > Folders. Here, you can also add File Explorer, other common folders, and Network icons.
Get Better Recommendations
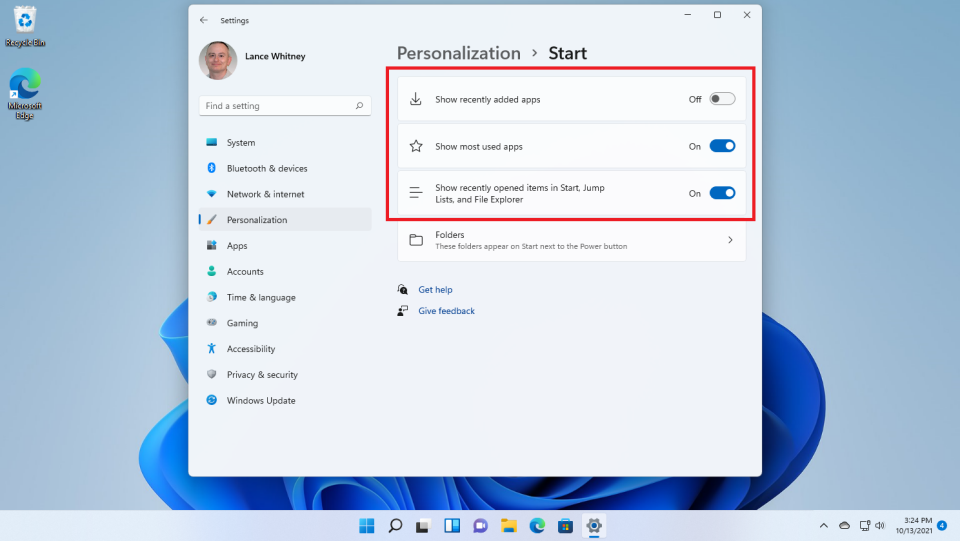
The new Start menu has a Recommended section for recent files and frequently used apps. To customize what appears here, open Settings > Personalization > Start so you can tell Windows to stop showing recently installed apps, frequently used apps, or recently opened items in the Start menu, App List, and elsewhere.
Change Default Apps
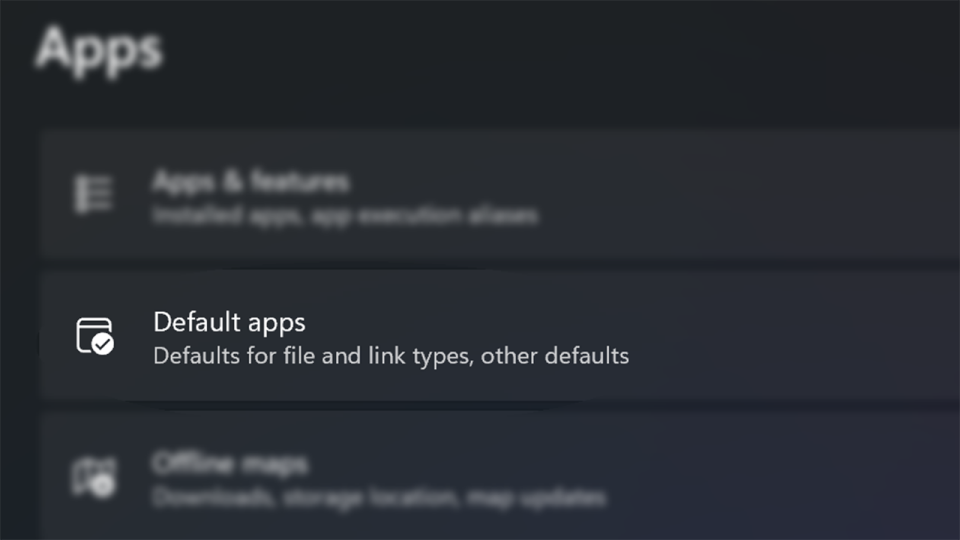
In Windows 10, it’s easy to choose a default app, but with Windows 11, the process is more complicated, as you need to specify a default app for every file type. Open the Settings app and tap on the Apps section in the left-hand menu. Choose Default apps, click on the app you want to set as the default for a file type, and you see a list of all file types that it’s capable of handling. Click on the file type you want, and select an app from the menu that pops up. For a full rundown of the process.
Choose Your Theme
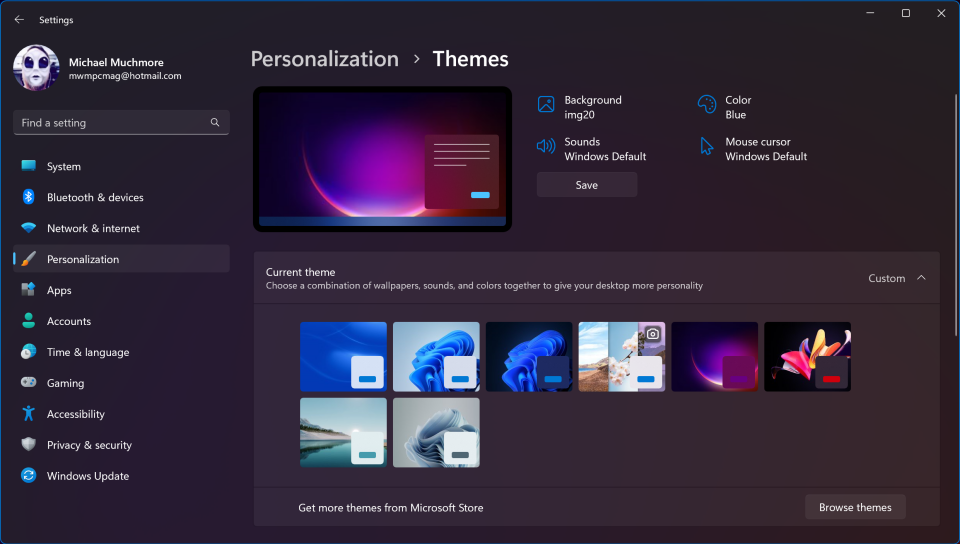
Themes make a return in Windows 11, but this time they work hand-in-hand with dark mode. Open Settings > Personalization and select one of the default themes to change the background image, sounds, cursor, accent color, and color theme all at once. Open Themes to edit current themes, add new themes from the Microsoft Store, or create your own.
Visualize Your Battery Better
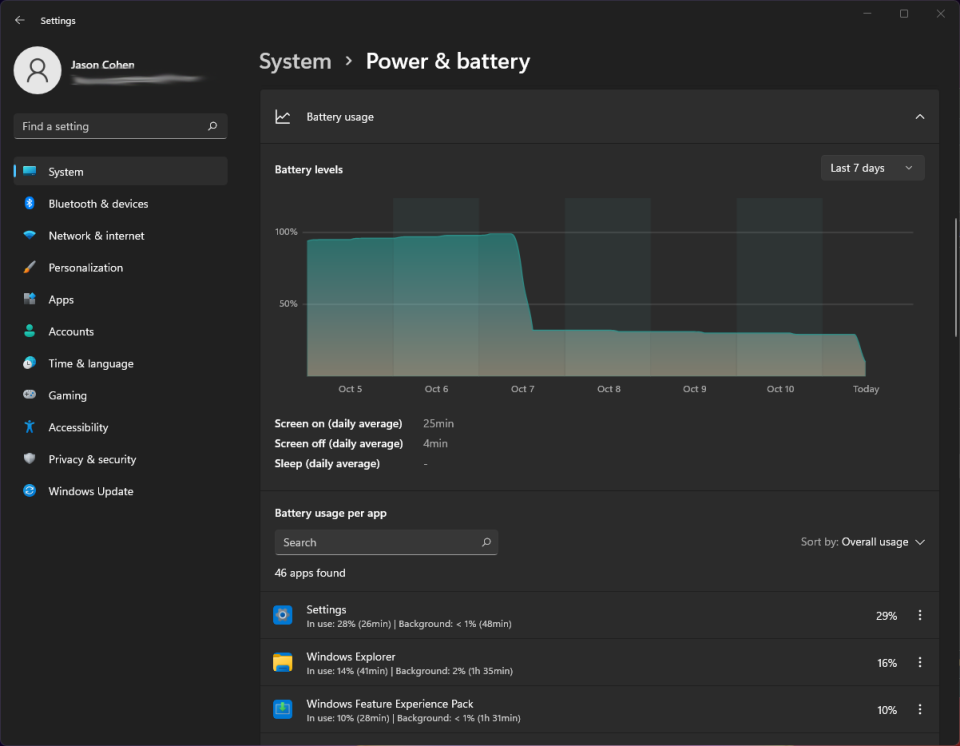
Windows 11 does a better job than its predecessor of helping you visualize your battery usage data. Go to Settings > System > Power & battery, then open the Battery usage tab. A chart shows how much power you have used over the last few days or hours. A list of apps below that shows power usage by individual app. If you find a program that may be using too much power, you can shut down background usage and put it to sleep, just like iPhones and Android devices allow you to do.
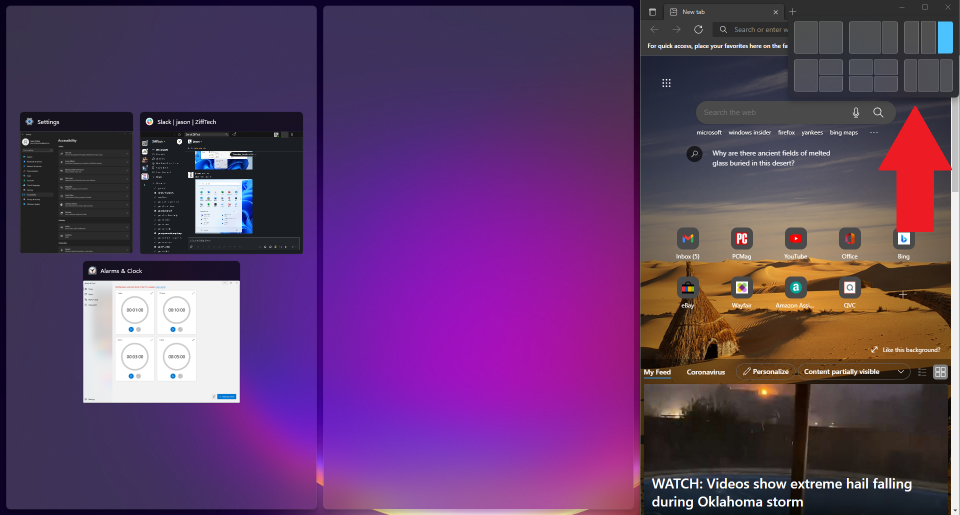
Get Used to the New Touch Gestures
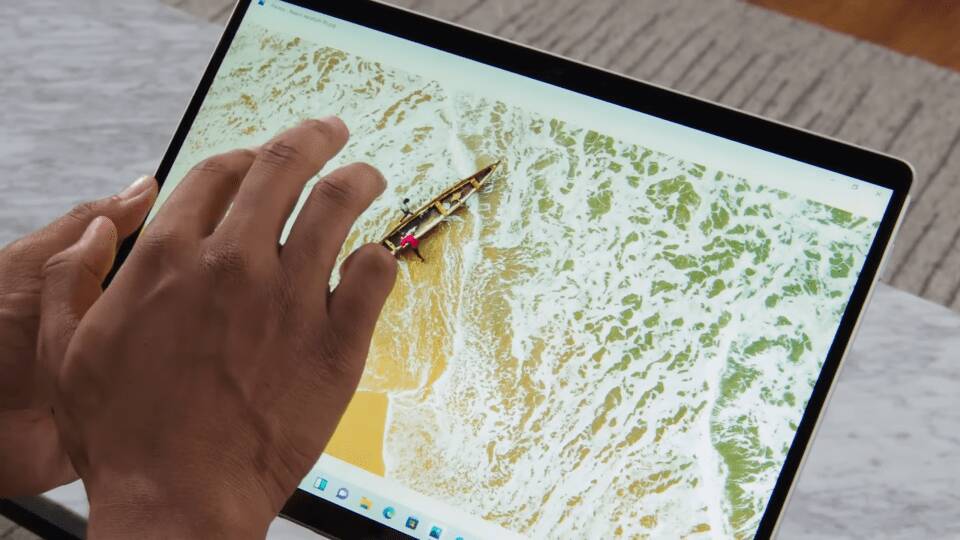
If you’re using a touch-screen PC convertible or tablet, like the stunning new Surface Pro 8, you have to get used to a whole new set of touch gestures, many of which involve using multiple fingers. Swiping in from the left side no longer opens task switching mode, but rather the Widgets panel of news and information. To show the Task View, you now have to swipe up on the screen (anywhere) with four fingers. Swiping in from the right still thankfully opens notifications. Swiping down from the top no longer closes an app, but you can swipe down in an app window with three fingers to minimize an app and show the desktop. Swiping three fingers up opens all running windows.
Run Android Apps
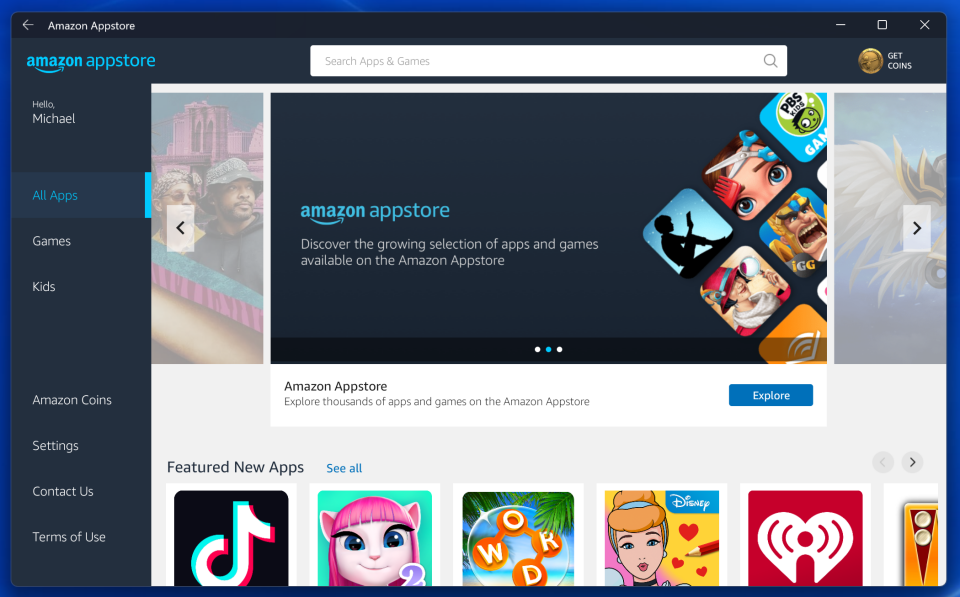
Microsoft shocked the world when it announced that Windows 11 would be able to run Android apps—that is run Android apps directly on the Windows hardware, no Android phone required. The capability comes thanks to the Android Subsystem for Windows and leverages the Amazon AppStore to actually get the apps. You install the Amazon AppStore from the Microsoft store and run a setup for the subsystem. It’s not as convoluted as it sounds, but the initial setup is less than instant.
A three-step installation wizard takes you through the process and requires a restart. And of course, you need an Amazon account. But it’s pretty cool to see the app icons in your taskbar just like they’re standard Windows apps. It’s particularly useful for apps that restrict some features to mobile use. For example, the TikTok Windows app doesn’t let you post directly from your PC’s webcam, while the Android version does.
Learn New Keyboard Shortcuts
Windows 11 has new keyboard shortcuts, and they’re worth learning. New are:
- Windows Key-W to open the Widgets panel
- Windows Key-A to access the Quick Settings
- Windows Key-Z to access Snap Layouts
- Windows Key-K to cast media
A couple of the best keyboard shortcuts are still in place from Windows 10, including Windows Key-V to show clipboard history and Windows Key-Shift-S for the screenshot tool.
Invoke the Game Bar
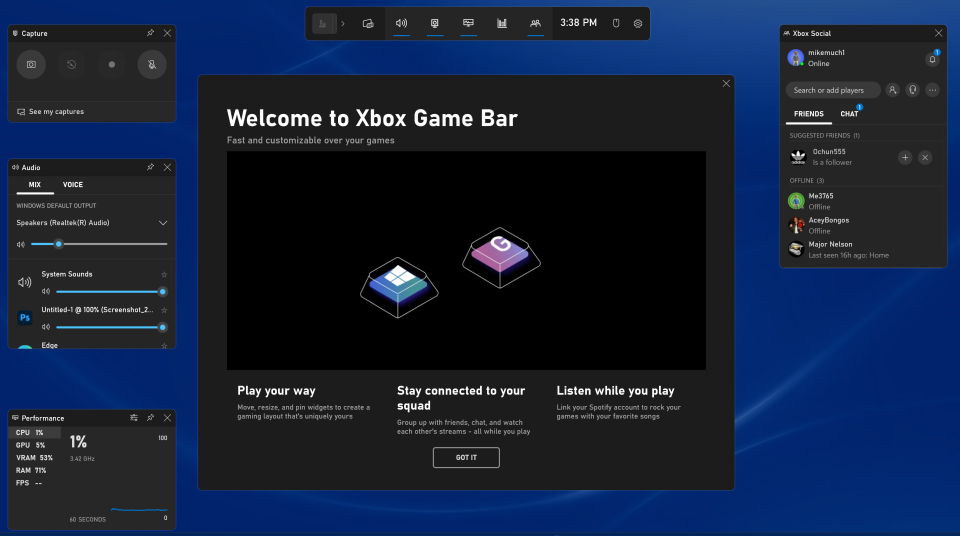
Tapping Windows Key-G opens a panoply of utilities useful not only to gamers but to any Windows 11 user. It lets you record screen activity and see system resources and performance stats, as well as chat with gamer pals and see your Xbox Achievements. It also offers audio and display settings such as HDR.
Record Audio With the New Sound Recorder App
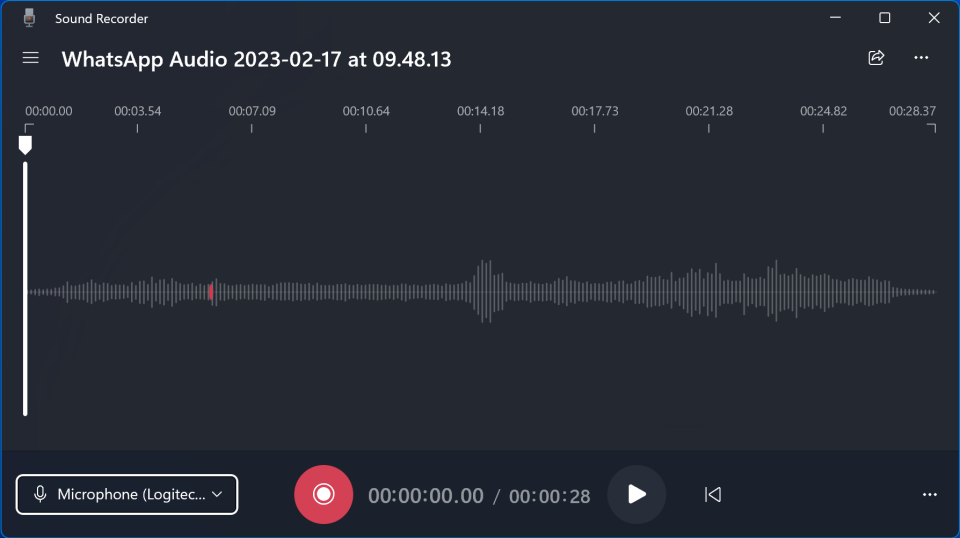
Replacing the Voice Recorder is Windows 11’s new Sound Recorder. The app has a redesigned interface that shows audio waveforms and more input options. It also allows you to output in a good selection of formats including AAC, MP3, WMA, FLAC, and WAV. That said, it’s pretty basic, with no audio trimming capability.
Listen and Watch With the New Media Player
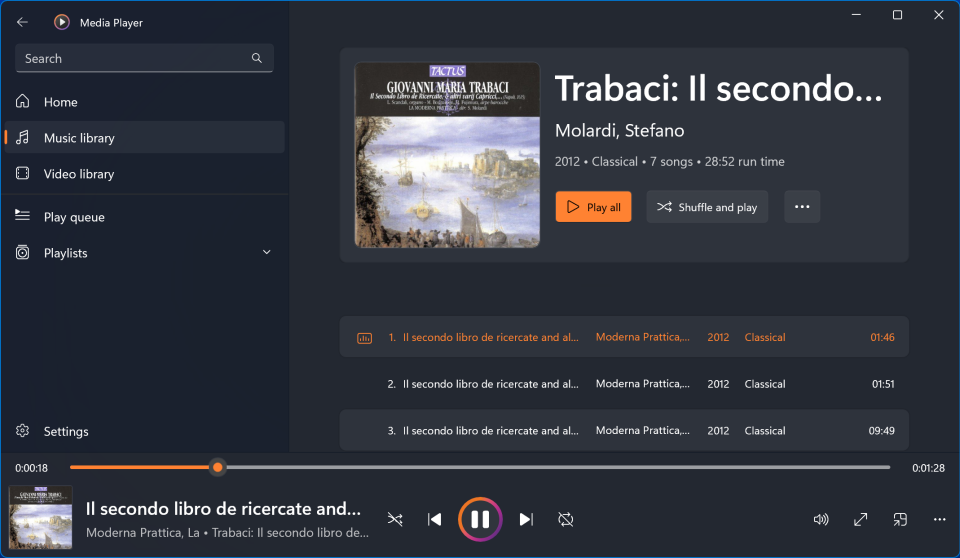
Replacing the Groove app, the new Media Player in Windows 11 still lets you get your groove on while listening to music or watching videos. It’s far more user-friendly than the old Media Player, which you still need to use for CD ripping as of this writing.
Turn on Windows Title Bar Shake
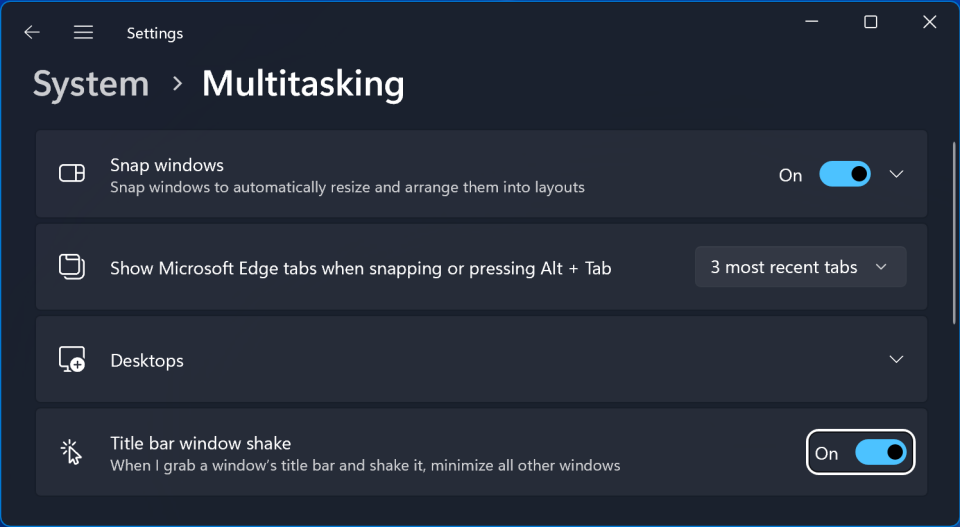
This last tip is a holdover from earlier versions of Windows, and it’s not enabled by default in Windows 11. There’s a Setting that lets you grab a window’s top title bar and shake it to dismiss all other windows. We use it all the time to clear out a messy desktop and focus on the active window.